Wednesday, December 26, 2012

Bake 52: Week 52!! Thick and Chewy Triple Chocolate Cookies

 Who can believe it's the last week of Bake 52?!!  I learned this year that time flies when you're baking. ;) I've had so much fun baking new recipes, learning new things, tricks and techniques and making new friends.  Thanks to all my baking friends who participated this year, whether it was baking with me every week or just reading and following along.  

We have decided to start a dinner group for 2013.  We will be posting twice a month for our new group starting the 2nd Wednesday in January.  So be ready for that and if you want to join us, let me know!

It's hard to tell from the pictures exactly how big these cookies are.  They're about 3.5 inches in diameter and plenty if each person only has one cookie!  Not to mention they are pretty rich.  It's a good thing for me because I LOVE chocolate but I guess it's not for everyone.  (Not that I understand that kind of thinking)  These were the perfect cookie, chewy on the outside, soft in the center and stuffed with more chocolate than anyone thought was possible.  You can opt to leave out the chocolate chips if you are scared about these amounts of chocolate but I don't scare easily.  I think these cookies would also be great to stuff things inside of-like rolos, peanut butter cups, oreos, whatever.

I didn't have parchment paper so I just baked the cookies on an ungreased baking sheet and it worked out wonderfully.  I melted semi-sweet chocolate chips for the melted chocolate and it seemed to work well too.
All in all, I think these cookies were great.  They go really well with a glass of milk.  ;)  If you are a choco-holic, you should give them a try!

Janet was our host for the week, you can get the recipe at her blog.  Thanks for hosting this week Janet, and picking a great recipe.

Wednesday, December 19, 2012

Bake 52: Biscotti (Chocolate and Peppermint)

 'Tis the season to over-do everything and shove peppermint in it.  Don't worry, I got the memo.  I am not sure what my fascination is lately with stuffing candy canes into everything but I am all about it.  I don't even normally like peppermint that much.  Or maybe I do and I just don't know it.  Either way, I'm a crazy un-stoppable force right now.  

This was my *third time making biscotti and my favorite so far.  Almost assuredly because of the chocolate involved.  I am not sure why I didn't think to do that last time.  It seems like most of the group used the chocolate chip variation in the book and, of course, I am one of them.  I bet the almond biscotti would also be good with chocolate slathered all over it though. :)

After adding the chocolate and peppermint to the dough (I halved the recipe, used about 1/2 cup mini chocolate chips and 2 crushed candy canes) and while it was baking I was thinking about seeing chocolate covered biscotti somewhere and decided to go big or go home.  When it came out of the oven, I just put some chocolate chips on top, let them sit for a minute and then smoothed with a knife.  I am sure I could have made it harder by whipping up some melted chocolate with oil and then dipping them but I forgot about the over-doing everything-thing.  Momentary lapse.
These were pretty good and if I would have made them sooner, I would have considered making them to go with the gifts we gave out this year, which I still need to share.  As it was, I made them tonight. ;)  And that's the reason my pictures are slightly more horrific than usual.  I need the sun, man!

These would be perfect with hot cocoa, I am off to try that.

Emily was our hostess for the week, you can get the recipe at her blog.  Thanks for hosting this week Emily!

 *1st time was almond bicotti and was for this recipe, and the second time was cinnamon flavored

Tuesday, December 18, 2012

TWD: Finnish Pullah

I haven't heard of this particular bread before.  It's essentially a yeasted sweet bread.  It's supposed to be flavored with Cardamom but I didn't have any and wasn't sure it was a flavor I would like so I took the advice of a fellow baker and subbed cinnamon and nutmeg (1 tsp cinnamon, 1/4 tsp nutmeg) for the cardamom.  It was delicious.  I left off the almonds and used turbinado sugar instead of peal sugar.  Everyone loved it. 
The dough was easy to work with and the braiding wasn't as big a deal as you would think  I am going to try it again sometime with the cardamom and see how that goes.  It's super festive and I am sure anyone would love to share it with you or receive it as a gift. :)
You can get the recipe by buying the book or visiting Erin's blog for the recipe.  She was our host for the week.
If you'd like to see what the other TWD bakers did this week, you can see their links HERE.

Monday, December 17, 2012

Homemade Marshmallow Stars

I will never be the same.  I really don't know how else to say it.  
I can't believe we have been eating store-bought marshmallows for so long when we could have been eating these.  And I wasn't expecting to feel that way.  
I really thought they wouldn't be much different taste-wise but I wanted to make marshmallow shapes. I was especially worried after working with the gelatin.  The smell of that stuff just makes me want to throw up a little bit.  So I was smelling that and thinking:
This is going to be disastrous.
These are going to taste like pure gelatin (gag)
I am going to end up just using store bought mini-marshmallows.

...and a few other things that I won't bore you with.  I was wrong on all counts.  I feel like I have never truly had a marshmallow until now.  And it was easy, almost too easy.  If you have a candy thermometer, a mixer and a brain, you can pull these off. 

You don't have to cut these into stars.  Candy cane shapes would be so cute with some peppermint flavoring and food coloring in the recipe (There's a recipe HERE for peppermint marshmallows that would be cute as candy canes).  Christmas trees would be cute too.  I just liked the idea of stars and I happen to have small enough cookie cutter that would work for what I needed.  My cutter was just shy of 2 inches (from the top point to the bottom point) and I got 77 stars and a bunch of scraps that were turned into mini-marshmallows.  You can also just cut these into squares and not worry about the shapes at all.  They are so good, they don't need a shape. :)

Homemade Marshmallow Stars
4 envelopes unflavored gelatin (3 1/2 T)
3/4 cup cold water
3 cups sugar
1 1/4 cups light corn syrup
3/4 cup water
1/4 tsp salt
2 tsp vanilla
1 1/2 cups powdered sugar
cooking spray 
18x13 pan
tin foil
wax paper

Line an 18x13 pan with tin foil and spray well with cooking spray or brush with canola or vegeatable oil.

In a medium saucepan, heat sugar, 3/4 cup water, corn syrup and salt to a boil over high heat.  Clip a candy thermometer to the side of the pan and continue cooking, without stirring until mixture is 238 degrees (or soft ball), about 9 minutes.

Meanwhile add 3/4 cup cold water to the bowl of a stand mixer and sprinkle with gelatin.  Let soften 5 minutes.  Attach whisk attachment to mixer

Once sugar mixture reaches 238, turn the mixer onto low speed and slowly add the sugar mixture to the gelatin mixture.  Gradually raise the mixer speed to high.  Beat until mixture is very stiff, about 12 minutes.  (It helps to set the timer for a reference.)  Bowl should just be warm.  Slowly beat in vanilla and combine.  

Scrape into prepared pan and smooth the top with a grease spatula.  I also greased a sheet of wax paper and placed it over the top and smoothed with that, then removed it.  Set aside, uncovered, until firm, about 3 hours.

Sprinkle 1/3 cup powdered sugar over the top of the marshmallows, and flip onto counter top.  Remove foil and sprinkle another 1/3 cup powdered sugar over the marshmallows (so now both side have powdered sugar).  Add remaining powdered sugar to a plastic bag.  Cut marshmallows into desired shapes, add a few at a time to the bag with powdered sugar and toss to coat all sides of marshmallows.  Roll remaining sheet of scraps into a roll and cut into desired pieces, coat in powdered sugar and store.  Can be stored in airtight container for 4 days.  


These are good just to eat, good in hot cocoa.....


And I checked to be sure they were good toasted and they were freaking amazing.  Seriously.


These were part of my Christmas gifts this year (the stars anyway, the mini marshmallow scraps were saved for us to use), hopefully in a day or two I will share the rest. I am sure you are super prepared and already ready for Christmas, but if not, maybe this will give you an idea or inspire something similar.  Oh and these are gluten and dairy free!  These would make a great gift by themselves, maybe just cover them with chocolate and put them in a cute bag, or you could turn them into the these marshmallow pops.  Any recipe that calls for marshmallows has to be 20 times better with homemade used instead.

Adapted from MarthaStewart.com

Wednesday, December 12, 2012

Bake 52: Chocolate Cake Roll with Peppermint Ice Cream

 I was planning on making this according to the recipe until I read Michelle's blog post.  The original recipe has a cream filling but she was discussing the possibility of using ice cream.  That was the only push I needed.  I know, I am so easily swayed.  My grandparents used to own an ice cream shop in my hometown.  They made their own ice cream and popsicles. They also made ice cream cake rolls and it was one of my favorite things we made.  I didn't get to have it very often because they were pretty long, like 24 inches, and we only sold them as an entire cake roll, not in slices.  Birthdays and special occasions were about the only time we got to indulge. I wish I had some super secret recipes from my grandparents but I don't.  I am going to have to interrogate some family members to see what I can come up with. ;)

Obviously, I substituted ice cream for the cream filling.  We had a bucket of vanilla ice cream in our freezer and some candy canes so I thought I would make some peppermint ice cream to make it a bit more festive than using regular vanilla.  I used about 3 1/2-4 cups of ice cream and about 6 candy canes.  I spread some wax paper on a baking sheet (18x13 since that was the size of the cake).  I put a little over a cup of ice cream and 2 candy canes in my food processor and processed until combined and then spread it on the baking sheet.  I repeated that with the remaining ice cream and candy canes (2 more batches).  Once the ice cream was spread out pretty well on the baking sheet, I covered it with wax paper, kind of patted it down so it was even and then froze it for about 45 min to 1 hour.

I was a little worried about waiting longer than the 15 minutes the book specified to fill the cake but it worked out okay.  It might have been a bit more brittle and there was one spot that cracked a little but I really can't complain.  After the ice cream had chilled for an hour, I took it out, took the wax paper off the top and flipped it onto the unrolled cake, removed the other layer of wax paper and then rolled it up as tight as possible.  Wrapped it tightly in plastic wrap and then put it back in the freezer for about 3 hours or until firm. Then I made the glaze and directed.

The cake wasn't quite right as far the cake rolls I am used to.  It's lighter and more airy than the cake rolls we used to make. I remember them being made with denser cakes, almost brownie like cakes. This was still really good but I might try to experiment with it a little.  I was also appalled that there wasn't any butter or oil in the cake.  Weird, right?  I had to read the recipe a couple times to be sure I wasn't missing something.

I love this kind of recipe because it's easy but looks so impressive.  You should give this a try, Michelle, our host for the week, has the recipe on her blog (and how to make it gluten free!).  Thanks for hosting this week Michelle and for inspiring me to make it with ice cream. ;)

Wednesday, December 5, 2012

Bake 52: Large Danish Braid

I knew when I looked at this recipe a few days ago that it was probably a 2 day process.  It doesn't have to be but it's easier to give yourself a couple days so you don't feel rushed.  Yesterday I made the danish dough and did all the rolling and folding, which really isn't that hard, just takes a little time.  You roll it out and fold it over a few times, refrigerate for 2 hours and then repeat.

This morning, I rolled it out, made the fillings and baked it.  I chose cream cheese and strawberries (1 cup frozen strawberries, pureed with 1/4 cup sugar and 1/2 tsp lemon juice, simmered until thick) for the filling.  Of course we all loved it.  We are strawberry lovers around here and you all know how I feel about cream cheese.  I almost threw some Nutella in there too but I figured after folding all the butter into the dough, we were going to be consuming enough fat and calories without it.
 After baking it at 400 {Next time I would go with 375 degrees maybe.  It seemed like mine was more done that I'd like on the bottom.  Or maybe just double up on the baking pans like Betsy suggested a while ago.} for 22-25 minutes, the glaze is brushed over it.  I was maybe supposed to brush all the glaze over it, but I just did one coat and still had plenty left.  
 Since I had glaze left, instead of starting over with the icing, I just added some powdered sugar to my left over glaze to make the icing.  And I still had some left over.  Maybe I was just supposed to douse this thing?

This is super fancy, super delicious and not too hard.  It would be perfect for a special brunch or dessert on a special occasion or just a Wednesday. :)

Jen O was our host this week.  If you'd like the recipe, you can head over to her blog.  Thanks for hosting this week Jen, it was a great pick!

Tuesday, December 4, 2012

TWD: Gingerbread Baby Cakes


I have always known that Julia's tastes were much more sophisticated than mine.  I wasn't fooling myself.  But after the last recipe, (the brownies) I started to feel like maybe we weren't that different after all.  Maybe we were kindred spirits.  Maybe I had completely misjudged the situation and we were actually BFFs at heart.  Then this week's recipe smacked me in the face.  And I remembered that there isn't much sophisticated about me and especially not my palate.

I have never made a baby cake before.  I thought that was just a nickname people used.  "C'mere baby cakes."  You know, that kinda thing.  But I guess that nickname came from somewhere, probably these cakes?  Or maybe it's not a nickname and I heard someone say it and thought they were talking to someone else but they were actually talking to a small cake.  It's hard to say.  Of course, I didn't have baby cake pans so I used some ramekins that I had.  I made 1/4 the recipe and it made 2 small cakes.  The only problem, and maybe it's not a problem at all, is that I added the wrong amount of molasses.  I was supposed to add 1/2 cup for 1/4 of the recipe but I guess when I saw molasses, my brain automatically went to tablespoons.  Who would add more than tablespoons of molasses to a cake?  What are we making brown bread?  So I added 1/2 tablespoon instead of 1/2 cup.  Oops.  I realized it after putting the cakes in the oven.  The recipe said to rotate the pans to level batter, but my batter was way too thick to expect a pan rotation would do any good.  After reviewing the recipe a few times, I realized what I had done, but it was too late. (dun, dun, dun)

I wondered if they would still turn out with my error but I think it ended up being a blessing.  I am not a douse-everything-with-molasses kind of girl so I think if I'd added the full amount, the flavor might have been a bit much for me.  At is was, I was surprised how little I hated this cake.  I really expected to hate it.  It didn't have nearly enough chocolate and it seemed like way too much ginger but really it wasn't so bad.  It also has pepper in it.  Yeah, pepper.  I know I have heard of  pepper in a cake before, but I didn't expect I would actually put pepper in a cake (I know I am not sophisticated enough).  All in all, it wasn't so bad.  I ate half of a baby cake and maybe even enjoyed it a little bit.  I probably wouldn't crave these or make them for myself.  But if I knew someone who liked gingerbread and pepper a lot, I would probably make it for them.  
The inside was still a bit gooey when we cut them open but I liked it like that.  I am just glad they worked at all after my mess up! 
On a side note, Calvin thought they tasted good and Hadlee decided to be 'nice' and give Calvin her piece.  She is so selfless.

If you want to see what the other bakers did this week and maybe see what the cakes are supposed to look like, you can go HERE.

If you'd like the recipe, you can buy the book , or stop by the blog of our host for the week, Karen's Kitchen Stories

Wednesday, November 28, 2012

Bake 52: The Best Buttermilk Biscuits

 I am always completely skeptical when the name of a recipe includes 'The Best...'  I think it's over used and I also think, how can it possibly be known what is 'the best'?  Have you tried every recipe (to be fair, I am sure America's Test Kitchen has tried quite a few) and even if you've tried every recipe out there, how can you possibly know what people are going to like?  Everyone has a different idea of what makes 'the best' of anything.  I mean, some people like fudgey brownies, some like cakey, and there are some weirdos out there who don't even like brownies!  

And then there's biscuits.  I am sure that if you asked a dozen people, they would all have different ways to describe 'the best' biscuit.  Just to let you know, I have no idea if this is in fact, the best biscuit recipe.  It was good, we liked it.  It's been a while since I've made biscuits so I can't tell you if it's better than the recipe I've used before.  They might be my favorite but whether they are your favorite or not isn't for me to say.  

I feel like this might be the kind of recipe you have to make a couple times to get it perfect and that gives you time to add to it and make them how you want them.  I halved the recipe and it made about 7 biscuits and seemed to work well.
 I'd say if you are looking for a great recipe, give this one a try.  It might be your favorite.  It might be your idea of the best buttermilk biscuits.  It might be mine.  I am going to have to make about 10 batches of biscuits just to be sure. ;)  But in the mean time, it was a great recipe and if I needed biscuits for something, I would use it again.
Betsy was our host this week.  You can get the recipe at her blog.

Wednesday, November 21, 2012

Bake 52: Sweet Potato Pie (Crust-less)

Let me start off by saying that this wasn't my finest week.  It wasn't an epic fail, but it wasn't bliss either.  And it was probably my fault and these are a few reasons:

1.  I never know the difference between a yam and a sweet potato.  I have found myself googling it more than once.  When I went to Target, shopping, I trusted them to know what a sweet potato is and apparently, that was not smart.  What they had labeled as a sweet potato turned out to be a yam (or 2 lbs worth).
2.  I decided to make a crust-less pie because we are spending the holiday with some gluten-free people  and I also didn't really feel like dealing with pie crust.  Partly because:
3.  I wasn't in my own kitchen or even one I have cooked in before.  So not only did it make me not want to deal with the crust, but I also ended up baking the pie for about 25 more minutes than the recipe specified.  Was it the oven?  Do I not know how to work an oven?  Who knows.

It turned out okay and much better than I was expecting, but I still don't know if I would let this slide as dessert.  I bet if it were inside a nice flaky, buttery pie crust, I would change my mind.  

For the crust, I lined a pie plate with parchment paper and added a layer of walnuts

 Then sprinkled with brown sugar and filled it like the recipe told me to.  
I inverted the pie to serve so the walnuts were on the top.

I noticed a lot of the other bakers pies looked way different than mine when they came out of the oven and they all had great reviews of the recipe so I am tending to think that I just didn't have my mojo today.  And it might have helped to eat the pie with whipped cream.  There was another fail on my part.  ALWAYS ADD WHIPPED CREAM!!!

Talesha was our host this week and chose the recipe, you can see pictures of what the pie should look like, along with the recipe at her blog HERE.

And if you want to see what the other Bake 52 members thought this week, use the links below. 


Tuesday, November 20, 2012

TWD: Best Ever Brownies (Are they?)

When I saw the title of these brownies, I thought, "Hmmm, we'll see."  How can they possibly be better than my favorite brownie recipe?  Or even  my second favorite?  Those two are hard to beat in my book.  I was surprised with how much I ended up liking these.  I will be making them again and I feel like I now have three favorite brownie recipes.  To which I say, this is one thing you can never have too many of.
They were super delicious with ice cream which is one of my brownie requirements.  I didn't have a 9X9 pan so I used an 8X11.5 and it worked great.  I also substituted semi-sweet chocolate for the bittersweet.  
They were fudgey and gooey, but not too gooey and completely delicious.  If you are looking for a great brownie recipe, you should give this one a try!

You can get the recipe at A Beautiful Mess

If you'd like to see what the other TWD bakers did this week, you can go HERE.

Friday, November 16, 2012

If you Invited me to Thanksgiving Dinner (And tips for hosting)

There's a lot of planning going on in cyberspace for the most awesome holiday of the year.  I thought I would give you some menu ideas.  Are you attending a dinner?  Have you been asked to bring something?  Or are you hosting yourself and need some tips?  You can't be too prepared so I thought I would share some of my tips for Thanksgiving.

If you asked to bring rolls to Thanksgiving dinner, I would bring these:

If you asked me to bring mashed potatoes to Thanksgiving dinner, I would bring these:

If you asked me to bring a green salad to Thanksgiving dinner, I would bring this Apple Bacon Salad with Craisins and Poppy Seed Dressing.

If you asked me to bring a side dish, I would probably bring this:

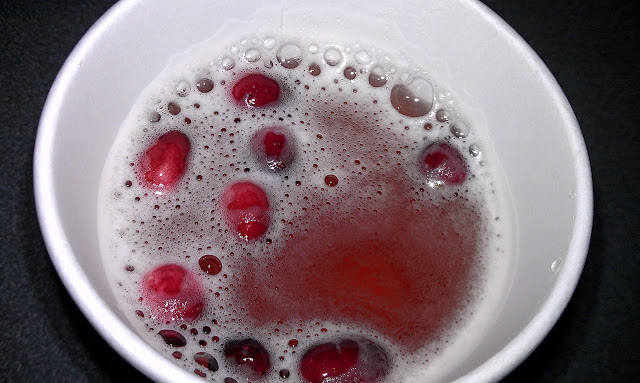
If you asked me to bring a drink, I would bring this Homemade Sparkling Cider
If you asked me to bring dessert to Thanksgiving dinner, I would bring one of these desserts:


Oreo Cheesecake (I'd probably do the mint-twist but that's up to you)


Can you tell dessert is my favorite part?  It is.  

Tips for Hosting Thanksgiving.
♥  Don't be afraid to ask people to bring things.  I think the best dinners can be when everyone brings something because when people only have to focus on one thing it's less stressful and everything is made with extra care. (And that makes it extra delicious)
♥  Do yourself a favor and get a roaster oven (like THIS ONE )  It's so worth the money and it will save your sanity and oven space.  Also, they cook the most juicy turkeys you've ever had.  Even if they didn't save on oven space, I would consider them necessary.  I would cook a 20 lb turkey and it would be done in 3 hours and amazing.  Just be careful not to lift the lid too often to check on it and don't put more than one turkey in there, it's disastrous (yes, I did that one year).   Also, make sure the turkey you buy will fit in the roaster oven you have.  
♥ Use your crock pot!  The last few minutes of getting the turkey on the table is pretty hectic.  Pulling rolls out of the oven, getting things on the table, making the gravy and ten million other things.  Making a side dish in your cock pot frees you up in the last few minutes because it's already to dish up when dinner is ready.  Like the Candied Yams with Apples and Cranberries (above) or these delicious Crock Pot Mashed Potatoes or this Creamy Corn.  It's one less thing you have to worry about during crunch time!
♥  Make desserts the day before.  All of the desserts listed above (with exception of the pie) are just as good, if not better the next day.  Make them the day before so you can just pull them out of the fridge when you need them.  The caramel for the caramel pecan pumpkin pie can be made the day before, stored in a storage container in the fridge and heated in the microwave when needed.  If you really need a pie, consider putting it together the day before and sticking it in the freezer and putting it in the oven about 2 hours before you're ready for it.  (Your cook time will be about 1/2 hour longer than usual) 
♥  Have a schedule written down and be very lenient with times.  For instance, if you know your turkey will take 3 hours to bake, then plan on starting it at least 4 hours before dinner time.  It will take you a few minutes to get it ready in the oven and you will need to take it out before eating to collect your drippings for gravy and let the meat rest before cutting.

This is an approximate schedule for our meals in the past, assuming dinner is at 2.
The day before, make all desserts
The day of:
8:30 start cooking mashed potatoes
9:00 whip potatoes and put in crock pot, preheat oven or roaster oven
9:15-9:30 am get turkey in the roaster as well as add giblets to stock pot with celery, onions and carrots
10:00:  Start rolls and get dough ready for the first rise
11:30:  dump roll dough out and let it rest for 30 minutes
12:00 shape rolls and set aside to raise (takes about 20 minutes) for an hour
12:30 prepare any other side dishes
1:30  remove turkey and put rolls in the oven to cook
1:40 remove dripping and stain stock.  Make gravy.
1:50  Remove rolls from the oven
2:00 carve turkey and serve.

This schedule assumes you will have people helping set and take things to the table.  If not, you will need to adjust your schedule and add those things to the time table.  

Which leads to my last piece of advice (which I need to take for myself sometimes):
If dinner doesn't go exactly as planned, it's okay.  Be thankful for what goes well.  If it's a complete disaster and you end up eating tacos on the beach (which is what I think we are doing this year), it's okay.  Breathe and be thankful for what you have.
If dinner isn't done right on time, don't freak out and start yelling at everyone to help you.  Take a breath and be thankful.
Don't let Thanksgiving dinner ruin your day.
Thanksgiving dinner should enhance your day, not rule it.
Be thankful.
For whatever you can think of.

As far as I'm concerned, if dessert goes well, that's all that mattes. ;)

Thursday, November 15, 2012

FYI: A giveaway

I posted this on Facebook earlier today so you may have already seen it.  I just wanted to let you all know about this giveaway.  It's for a $50 product of your choice and they have tons of kitchen products (not to mention tons of other products!).  Visit their stores to see what you would pick and enter to win!
50 dollar product giveaway

Wednesday, November 14, 2012

Bake 52: Spiced Pumpkin Cheesecake

 Update 11/14/12:  This was so good the next day, it tasted more cheesecake-y and delicious.  I am not sure if I was just being a cheesecake snob yesterday or if it's just REALLY good for breakfast (oops), but I am taking back my wishy-washy sentiments from the past.  So add that to the list; can and should be made ahead. :)

This was my week to host. I have been wanting to make pumpkin cheesecake for a while so I decided to try the recipe in our book, and make everyone do it with me.  :)

Tuesday, November 13, 2012

Honey-Lime Shrimp and Avocado Salad


Look at this!  Yesterday I promised a blog post on Facebook and here it is!  (I was sharing tips for storing cilantro)  I am not sure what my problem is, but I am all about the salad and veggies lately.  ??  Yeah, I don't know if my body knows it's Fall and I am supposed to be craving all things apple, cinnamon, pumpkin and cranberry.  I will try to break it to myself.  We've had this twice now because I bought some shrimp on sale. When shrimp is on sale, I am there.  I wish crab was on sale more often.....Anyway, we really liked this salad, like enough to have it twice in 2 weeks, so I thought I'd share.  It's fresh and pretty and healthy and delicious.  Are there anymore positive words I can use?  Oh yeah, it's fast too.  Enjoy!  And now that my internet is fixed, (WHOOOOHOOOO!!) I will, hopefully, be around more often!

Wednesday, November 7, 2012

Bake 52: Red Velvet Cupcakes

 We are officially in the home stretch of our baking year.  This week marks the end of another cycle and leaving only one cycle left.  Only 7 weeks left!  I can't believe it.  

This week was red velvet sheet cake and it should surprise no one that I made cupcakes instead.  Because that's what I do.  Cake isn't usually on the top of my dessert list but the last couple cakes we've made have started to change my mind.  It might be the cream cheese frosting.  Cream cheese makes everything better.  These were pretty quick and simple and easy to share with friends.

Was anyone else surprised with how little chocolate is actually in these? 

The only complaint I had was that the recipe stated I would get 24 cupcakes (but since I halved the recipe I expected 12) if I used a 1/4 cup scoop.   And I did, and I was careful about it.  And I only ended up with 9 cupcakes.  So if you are okay with only 18 cupcakes, then use the 1/4 cup scoop.  If you want 24, then use a 3 T of batter for each cupcake.  And yes, I did the math.  I think the only time I use math is when I am cooking. :)

So the difference in the directions would be:  Line cupcake pans with liners or spray with cooking spray.  Make batter, and spoon 1/4 cup (or 3 T depending on how many you want) batter into each liner.  Bake at 350 for 20-25 minutes.  Cool and frost.  
 I also halved the frosting recipe and it was plenty for half a batch of cake.  Each of these cupcakes has PLENTY of frosting, as you can see.  You might even be able to get away with 1/4 a batch of frosting.  I also added about 2 cups of extra powdered sugar (to half a batch) to get it to a firmer consistency.   If you are just spreading it on the cupcake, it doesn't really need to be firmer though.
If you are sad about the election, maybe whipping up a batch of these will make you feel a little better.  Remember what I said about cream cheese?  Makes everything better. ;)   You can get the recipe at Janet's blog.  She was our host for the week and chose the recipe.  Thanks for picking a great recipe Janet!

Tuesday, November 6, 2012

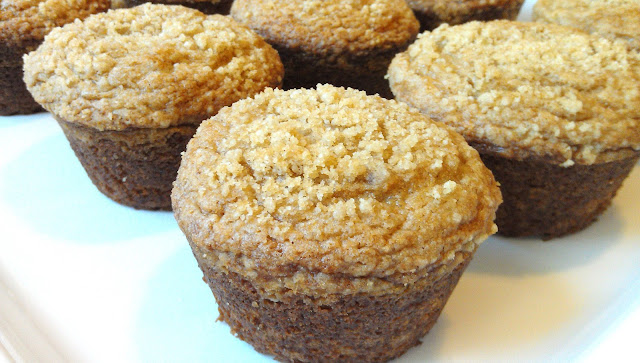
TWD: Buttermilk Crumb Muffins

These were pretty good.  Simple but good and I am all about simple but good.  They kind of reminded me of Amish Friendship Bread.  That was the flavor I identified them with anyway and I happen to love Amish Friendship Bread.  

Here's where I deviated from the recipe:
♥ Instead of using my hands to cut in the shortening, I used my mixer and whisk attachment.  I started with my hands and it was quite a mess, which made me wonder why my mixer was watching me do something she could do infinitely better.
♥ I substituted 3/4 cup sour skim milk and 1/4 cup sour cream for the buttermilk and it seemed to work pretty well.

What I would do next time:
♥  I would bake them at a lower temp next time, probably 325.  They seemed overly brown on the outside when they were just done in the middle. (Maybe my oven runs a little hot, I will have to look into that.)

♥  Make more topping.  You can never have too much topping, can you?

♥ I would probably half the recipe so I don't eat so many.  Or give some away.

 I hope you all are having a great election day! 

If you'd like a simple but good muffin recipe, give this a try.  You can get the recipe at the blog of our host for the week:  Easier than Pie

Wednesday, October 31, 2012

Bake 52: Apple Dumplings with Caramel Sauce

I am not sure what I thought these were when I heard the name.  In my head I combined a dumpling, like from chicken and dumplings, and apples.  Let's just say the actual dessert is WAY better than the one I was expecting.  Emily was our hostess for the week and decided to go a little easy on us since it was Halloween.  I think it was the perfect pick!  Instead of slaving away over any kind of crust, the recipe calls for refrigerated crescent rolls (the kind in a tube).  You roll them out a little bit, throw an apple, some butter and cinnamon/sugar in the middle....
 twist it all up
And bake it.  I couldn't resist an egg wash (1 egg yolk and 1 T milk whisked together, brush over pastries) and sprinkled them with sugar before baking.  They were super easy and super impressive!  These would be perfect for any occasion when you need something quick and easy but also want everyone to feel special. 

And when you cut the thing open, buttery yummyness oozes out.  
Oh, and I didn't make the cider mixture, I went with some caramel sauce instead.  Which is just as easy.

Caramel Sauce:
2 T butter, 1/4 cup brown sugar, 2 T heavy cream, heat in saucepan until sugar is dissolved.


And, of course, serve with ice cream. :)


Our kids, the Lego Forrest Police Officers. 
   Tyler made the costumes and everyone thought they were pretty cool.  We decided they aren't the most practical things in the world, but it was still fun. I hope everyone had a fun and safe Halloween!

If you'd like the recipe for Apple Dumpling, you can get it at Emily's blog (I hope all is well on the East Coast, Emily!)  Thanks for hosting this week!
Related Posts Plugin for WordPress, Blogger...
Pin It button on image hover